
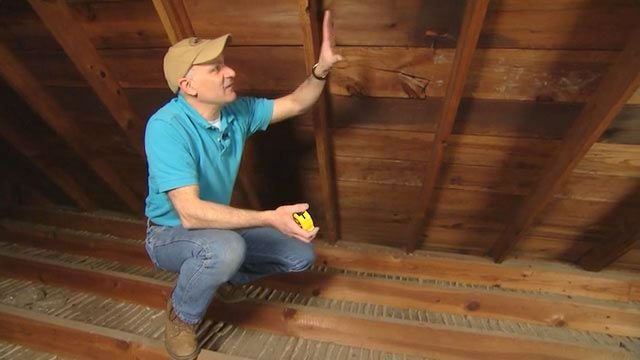
The attic is the best place to begin an attic roof leak inspection, since it sits directly under the roof and often shows evidence before anything appears on a ceiling. Go up during daylight or shortly after rain, when evidence is freshest, with a bright flashlight. Be careful where you step so you don’t put a foot through the ceiling below, and only inspect as much of the attic as you can reach safely.
During an attic roof leak inspection, look at the underside of the roof deck for dark or damp wood, water stains, mold, and any active dripping. Check for wet or compressed insulation, and look for raised or “popped” nails, which can show moisture on the metal. If you find damage, trace wet wood upward toward the peak of the roof, since water usually enters higher than where it collects.
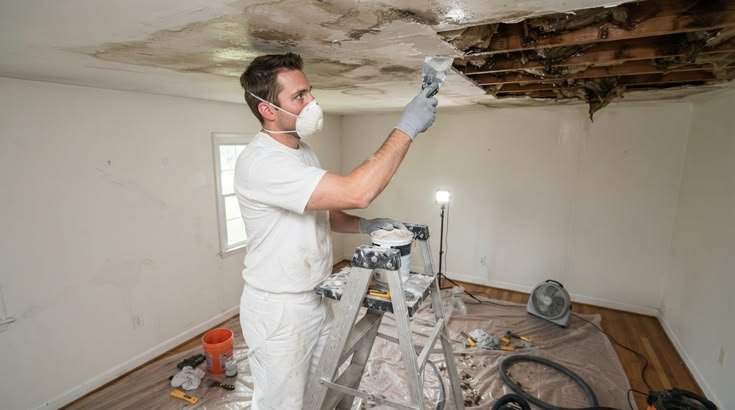
Knowing how to check your roof for leaks is easier with the right basics on hand. Gather these before you begin:
To find roof leak source points accurately, keep one rule in mind: the water entry point is often uphill from the interior stain, sometimes by several feet. Water follows gravity along rafters and decking, and it can pool on the attic floor or insulation before it finds a way through the ceiling. A stain in the corner bedroom can come from a flashing problem far across the house.
When you find roof leak source clues, note reference points such as a chimney, vent pipe, skylight, or exterior wall, and then locate the matching area on the roof. Also remember there can be more than one source contributing to the same stain.
Once the attic has narrowed the search, look at the roof surface, starting from the ground. Walk the perimeter with binoculars and look for missing, cracked, curling, or lifted shingles, exposed nails, and sagging areas. Check gutters too, since clogged or sagging gutters can back water up under the shingles at the roof edge.
Only go onto the roof if it is low-slope, dry, and you are comfortable there. NIOSH, part of the CDC, publishes ladder and fall-prevention guidance because falls are among the most serious hazards in roof work, so stay off any roof that is steep, wet, icy, or covered in tile or slate.
When you’re working through how to check your roof for leaks, some spots fail far more often than the open field of shingles. Check these first:
Flashing failure is one of the most common sources of leaks, and it is hard to spot from the ground because the failure points are small. For chimney-specific problems, see our guide on how to repair roof leaks around chimney, and for skylights read how to temporary fix a leaking skylight.
A roof leak hose test is the standard way to confirm an entry point when attic and exterior checks haven’t given a definite answer. It requires two people and dry weather. Never do it alone, because if you slip, no one can help.
One person stays in the attic with a flashlight, positioned near the area where the damage appears. The other person handles the hose outside.
Begin below the suspected area and move upward, one small section at a time. Spraying the whole roof at once makes it much harder to isolate the source.
Spend several minutes on each section so the water has time to work through, then wait before moving on. Your helper watches for the first drip.
When water appears inside, you have found the entry zone. Mark it, note what is above it on the roof, and stop the test.
The roof leak hose test is worth doing only if you can do it safely. If the roof is steep, wet, or high, skip it and have a professional run the test with proper equipment.
Before you assume the roof is the problem, consider the roof leak vs condensation question. Not every stain comes from rain coming through the roof, and some other sources look almost identical:
The roof leak vs condensation distinction matters because moisture that shows up mainly in cold weather without rain is more likely a ventilation issue than a hole in the roof. If the roof passes a thorough inspection and the hose test, shift your search to these mechanical and ventilation sources before assuming a structural problem.
Call a licensed roofer if you can see interior damage but can’t find the source after checking the attic and running the hose test. Leaks that only occur during wind-driven rain are also harder to trace and often need someone experienced. Call as well if the roof is steep, the house is more than one story, moisture or mold is already widespread, or the roof is near the end of its expected lifespan. Professionals can use tools such as thermal imaging that homeowners don’t have.
Don’t wait long once you suspect a leak. Even a small one can soak insulation and drywall quickly, and saturated insulation holds moisture long enough to support mold if it isn’t dried out and replaced along with the repair.
Once you know how to check your roof for leaks and have located the source, document it with photos, contain interior water with buckets and towels, and arrange a proper repair. For costs and causes by leak type, see our guide on roof leak repair. If you’d like a full look at the roof’s condition, our roof inspection service in Westchester covers the complete 21-point checklist, and our DIY roof and gutter inspection guide covers the routine checks you can do twice a year.
The Bronx and Westchester climate makes leak checks especially worthwhile. The area sees 25 to 35 freeze-thaw cycles each winter, which stress flashing, sealant, and shingles, and winter ice dams can force meltwater under shingles at the eaves. After winter and after any major storm, a quick attic check and a ground-level look at the roof can catch problems while repairs are still small.
The Quick Guys inspects and repairs roof leaks throughout the Bronx and Westchester County, with same-day response for active leaks. We hold New York State license WC-38593-H25 and carry full general liability insurance. We serve Riverdale, Mott Haven, Pelham Bay, Fordham, Yonkers, White Plains, Scarsdale, and surrounding areas. Call (929) 257-9396 for a free estimate.
The most common reason one paver quote comes in far below the others is a shortcut on the base. According to the Interlocking Concrete Pavement Institute, proper base preparation and compaction are what determine how well a paver installation performs over time. Skip the depth or the compaction, and the surface may look fine on day one and then settle, shift, and hold water once winter starts working on it.
When you compare bids, look at the specified base depth, the type of stone, and the compaction method, not just the total price. The average paver installation cost in New York is only meaningful if you’re comparing complete, properly built installations against one another.
How to check your roof for leaks comes down to a simple order of operations: attic first, then rule out non-roof sources, then check the usual trouble spots, and use the hose test only when you need it and can do it safely. The stain on your ceiling is a clue, not a location.
If you can’t find the source, or you’re not comfortable on the roof, that is exactly when a professional inspection pays for itself. Finding a leak early keeps a small repair from becoming a structural one.
Contact The Quick Guys directly:
Phone: (929) 257-9396 — call or text, available 7 days
Email: info@thequickguys.com
Website: thequickguys.com
Service area: Westchester County, the Bronx, Yonkers, White Plains, Scarsdale, and surrounding areas
For repair costs and causes, see our guide on roof leak repair. For a full assessment, visit our roof inspection service in Westchester. Call (929) 257-9396 for same-day response.
Start in the attic with a flashlight, looking for dark or damp wood, water stains, wet insulation, and mold on the underside of the roof deck. Then use binoculars from the ground to look for missing or damaged shingles and check the flashing around chimneys, vents, and skylights.
Water travels along rafters and decking, so the entry point is often uphill from the interior stain. Trace wet wood in the attic upward toward the peak, note nearby reference points like a chimney or vent, and check the matching area on the roof.
Two people work together: one in the attic with a flashlight, one outside with a garden hose. The outside person soaks one small roof section at a time, starting low and moving up, while the inside person watches for the first drip. Never do it alone.
Look for water stains and dark or damp wood on the underside of the deck, wet or compressed insulation, mold, raised nails, and active dripping. Check around every place something passes through the roof, such as vents, chimneys, and exhaust fans.
A leak usually shows up during or after rain and is tied to a specific area. Condensation from poor ventilation causes widespread dampness, often in cold weather without rain. Also rule out HVAC drain lines, plumbing, and bathroom exhaust fans.
Flashing around chimneys, skylights, vent boots, valleys, and wall junctions are common failure points, along with damaged shingles and clogged gutters at the roof edge.
Call a professional if you can’t find the source after the attic check and hose test, the leak only happens in wind-driven rain, the roof is steep or the house is more than one story, or mold and moisture are already widespread.